Setup the UI
In the Hierarchy, right-click and create UI Document with “UI Toolkit/UI Document”. Select it, and choose “UIToolKitBasePanel” for the Panel Settings field, and “UIToolKitBase” for the Source Asset field. These two come prepackaged with Parley to make things easier for you to get started.- YAML
- Graph
Writing the Dialogue
Create a folder atResources/English/Emotions/Create the following file inside it:en.Example.yaml
Setting up the Script
With the file ready, let’s get into the script.Create a C# script and name it something likeYamlEmotionsUIToolKit.cs and write the following.YamlEmotionsUIToolKit.cs
Wiring things up
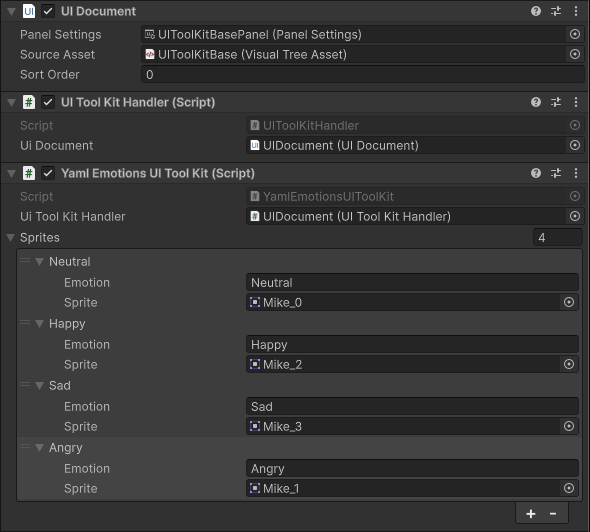
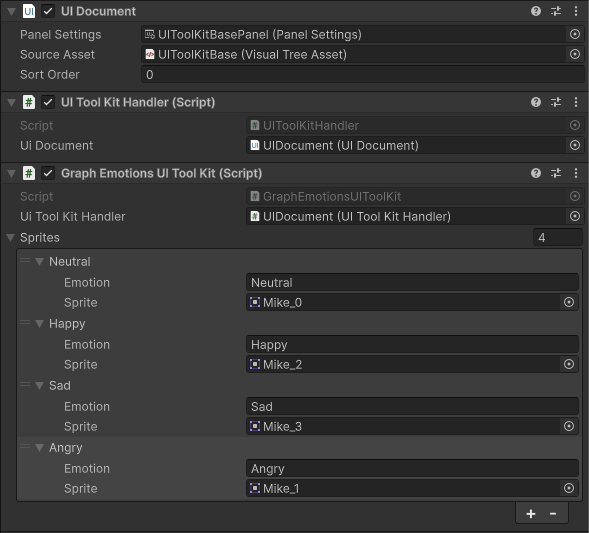
Back in the unity editor, add that script to the UI Document object we made earlier in the UI section, and click on the “Add Component” button and add a “UI ToolKit Handler” script, this also comes with Parley to handle all the functions we use to set UITK scenes.Assign the UI Document field in the UI ToolKit Handler component to the UI Document component above it.In the Graph Emotions UI ToolKit script, set the UI Took Kit Handler component to the UI ToolKit Handler component we added earlier. And create 4 sprite entries with the exact same emotions in the file, and assign each sprite.You should be left with something like this: